
Orion cockpit layout

In preparation for my Constellation program add-on, I collected some images about Orion's cockpit panel layout.

These are quite interesting and you can see how it is evolving.


2012 (NASA Systems Engineering Simulator)


2014  layout

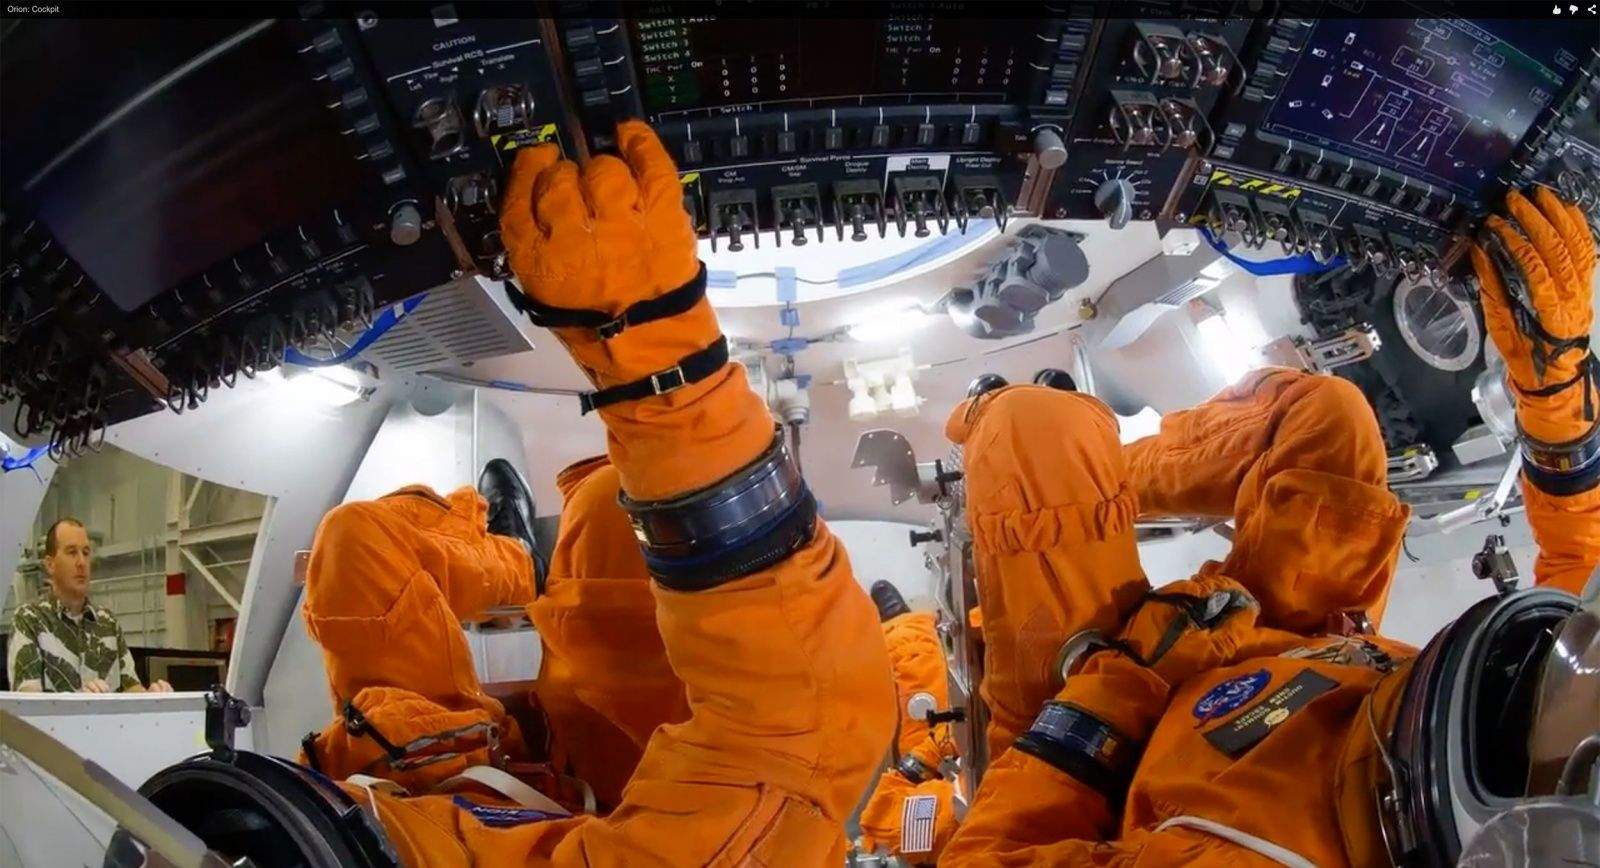
I assembled this view  from a NASA video showing most parts of the panel and LCD displays. Resolution is good enough to read most of the labels.


2014 Mockup


2015 Mockup

The 2015 mockup shows some diferences from the 2014 version. The design seems less monotonous and with a few less flip switches.


Image sources: NASA

Comments

Popular posts from this blog

Apollos 18, 19 and 20 for AMSO

Clearing a large backlog of released realistic add-ons over the last two years. I'll start with the cancelled moon missions based on the Apollo AMSO add-on for Orbiter. Flowing the general outline of the available NASA planning documents I did Apollo 18, 19 and 20, complete with terrain, patches and EVAs. Vallis Schroteri & Apollo 18 This add-on features realistic terrain for the Vallis Schröteri area near the Aristarchus crater on the Moon. It is presented in a way that you have a relatively large flat area (Orbiter limitation) where you can land and drive.  The area covered by terrain mesh is about 30x30km. Some surface features were placed to provide interesting destinations for EVAs, based on the actual geology of the region. The provided scenarios use AMSO to recreate the proposed Apollo 18 mission. They are generic and the orbital trajectories are not optimized regarding fuel or mission duration. Anyhow, I think I've remained within realistic paramete

Gemini B cockpit layout

The Gemini B was the military version of the Gemini spacecraft, adapted for use on the MOL (Manned Orbiting Laboratory) program. The general cockpit layout was similar, but many instruments were changed. I'm doing a 3D model of the cockpit, and as part of that I need to recreate the dashboard layout. For the normal Gemini we have great detailed instrument layouts, but for Gemini B we must work based on photos. I've identified as much labels as possible. Some probably have errors, but still I think you get the idea of the general operation. The main difference from the stock Gemini is that gauges and switches are more protected perhaps from accidental touching. Also you have controls for the MOL laboratory on the right hand panel. Left panel Center panel Bottom panel Right panel I'm working mainly based on two reference photos: (http://www.nro.gov) (unknown origin)